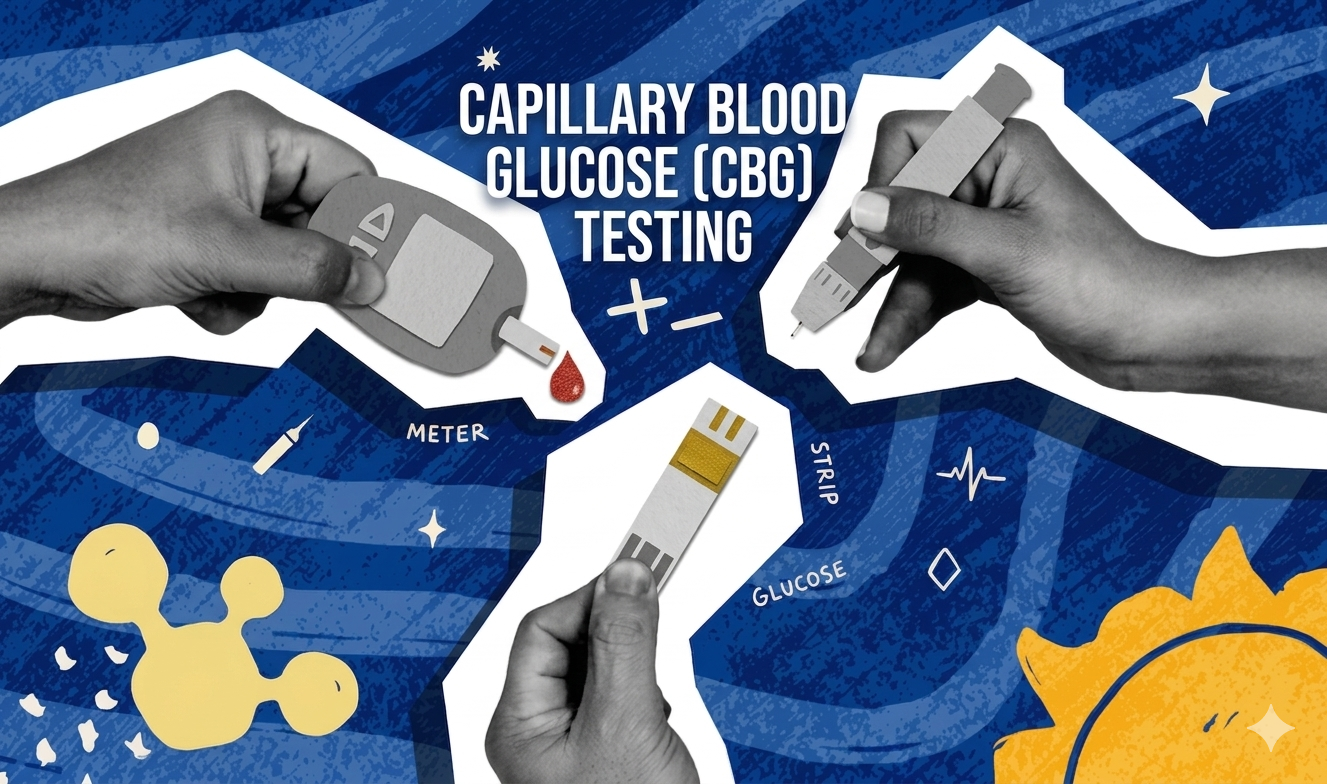
Capillary Blood Glucose (CBG) testing is a procedure used to measure the amount of glucose in capillary blood through a small skin puncture, usually from the fingertip in adults or heel in infants. This procedure helps monitor blood glucose levels quickly and accurately, especially in clients with diabetes mellitus, hypoglycemia, hyperglycemia, or those receiving insulin therapy. It is commonly performed to guide immediate treatment decisions and evaluate the effectiveness of glucose control measures.
Why is this procedure performed?
- To monitor blood glucose level
- To detect hypoglycemia or hyperglycemia
- To guide insulin administration
- To evaluate response to medications or diet therapy
- To assist in immediate clinical decision-making
Materials Needed
- Blood glucose meter (glucometer)
- Blood glucose reagent strip compatible with the meter
- Cotton balls wet and dry
- Clean gloves
- Sterile lancet (a sharp device to puncture the skin)
- Lancet injector (a spring-loaded mechanism that holds the lancet)
PROCEDURE
ASSESSMENT
- Check the physician’s order for CBG testing or monitoring.
- Review the client’s record for medications that may prolong bleeding such as anticoagulants, or medical problems that may increase the bleeding response.
- Assess the client’s understanding of the procedure.
- Assess the client’s response to previous testing.
- Assess the client’s skin at the puncture site to determine if it is intact and the circulation is not compromised. Check color, warmth, and capillary refill.
PLANNING
- Review the type of meter and the manufacturer’s instructions.
- Introduce yourself and verify the client’s identity.
- Explain to the client what you are going to do, why it is necessary, and how he or she can participate.
- Perform hand hygiene.
- Assemble the equipment at the bedside.
IMPLEMENTATION
- Prepare the equipment.
- Some meters turn on when a test strip is inserted into the meter.
- Calibrate the meter and run a control sample according to the manufacturer’s instructions and/or confirm the code number. The newer no-code models do not require calibration. The technology is integrated into the test strips.
- Don clean gloves.
- Select and prepare the vascular puncture site.
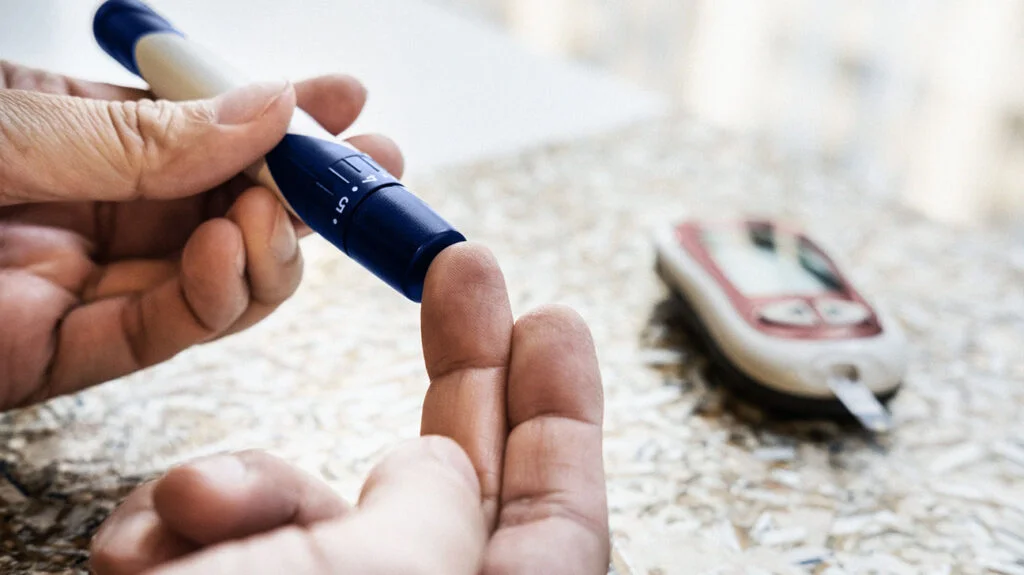
- Choose a vascular puncture site (e.g., the side of an adult’s finger). Avoid sites beside bone. Wrap the finger first in a warm cloth or hold a finger in a dependent (below heart level) position. If the earlobe is used, rub it gently with a small piece of gauze.
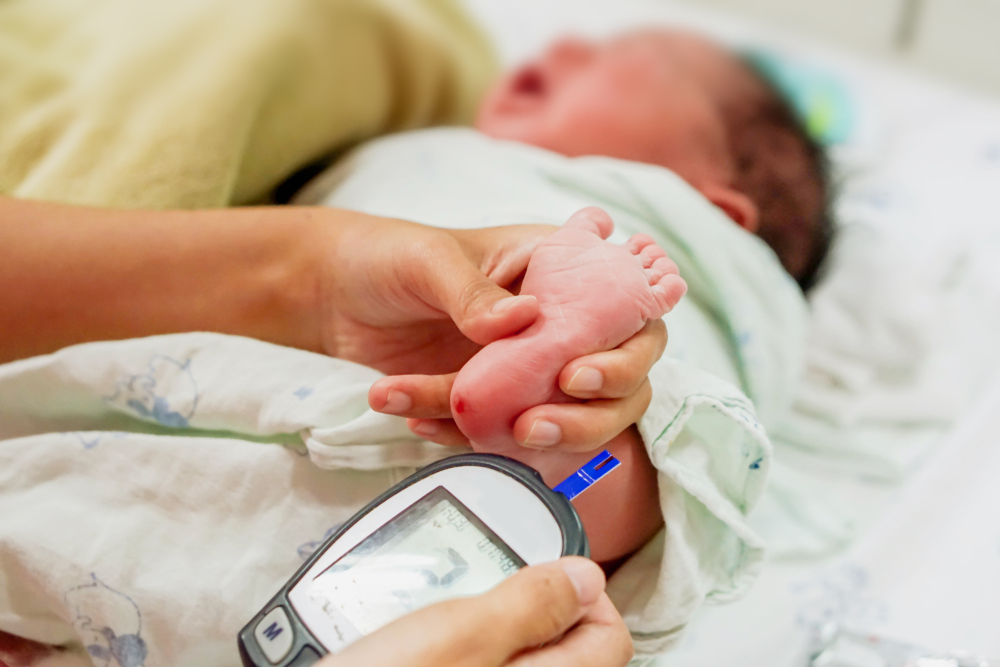
INFANTS – The outer aspect of the heel is the most common site for neonates and infants.
ADULT – Use the side of a fingertip to obtain a blood sample.
- Clean the site with the antiseptic swab and allow it to dry completely.
- Place the injector, if used, against the site, and release the needle, thus permitting it to pierce the skin. Make sure the lancet is perpendicular to the site. If no injector is used, prick the site with a lancet or needle, using a darting motion.
- Gently squeeze (but do not touch) the puncture site until a drop of blood forms.
- Hold the reagent strip under the puncture site until adequate blood covers the indicator square. The pad will absorb the blood and a chemical reaction will occur. Do not smear the blood.
- Some glucometers absorb the blood by just touching the puncture site with the strip.
- Ask the client to apply pressure to the skin puncture site with a dry cotton ball.
- Expose the blood to the test strip for the period and the manner specified by the manufacturer.
- As soon as the blood is placed on the test strip:
- Follow the manufacturer’s recommendations on the glucose meter and monitor for the amount of time indicated by the manufacturer.
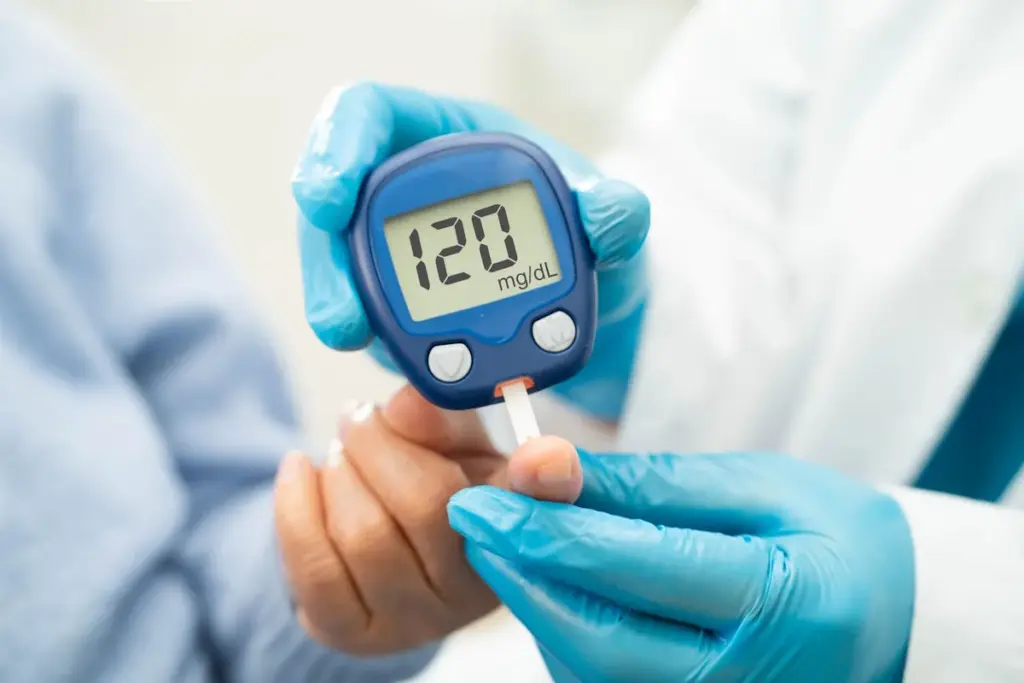
- After the designated time, most glucose meters will display the glucose reading automatically.
- Turn off the glucometer and discard the test strip, the cotton balls, and the lancet used.
- Remove gloves and discard.
- Perform hand hygiene.
EVALUATION
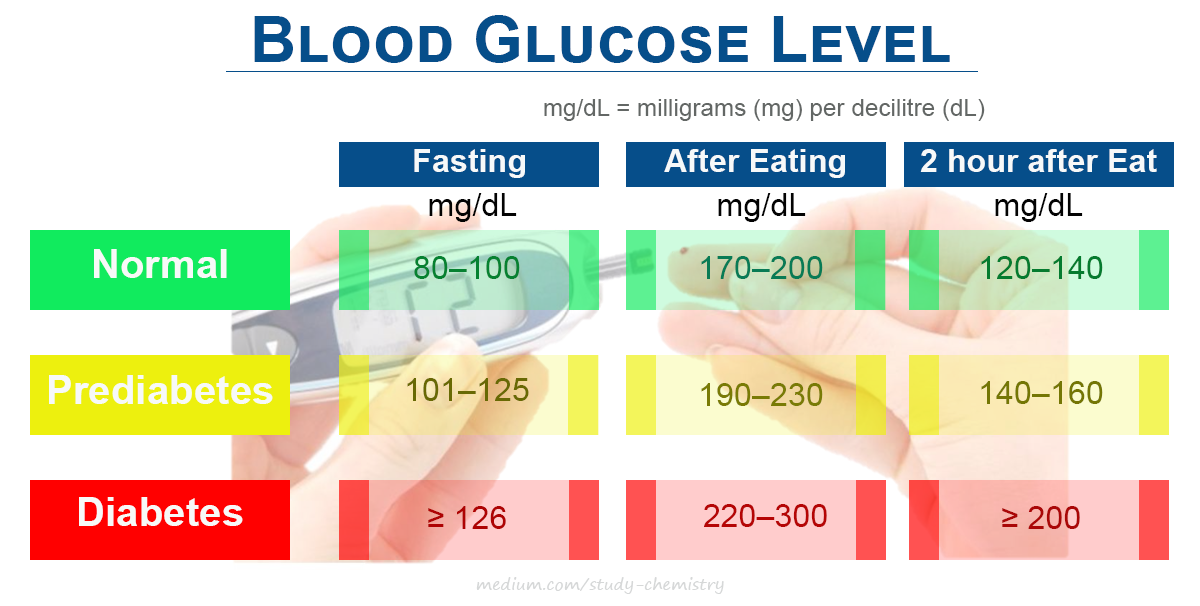
- Compare glucose meter reading with normal blood glucose level. Report abnormal results to the primary care provider.
- If there is a standing order or insulin sliding scale, compare the result to the scale and administer the indicated amount of insulin.
- Relate blood glucose reading to previous readings and the client’s current status.
- Evaluate the client’s understanding, ability, and motivation to demonstrate the test independently.
DOCUMENTATION
Document the method of testing and results on the client’s record as well as administered insulin if there is any.