Ampule preparation and administration of subcutaneous and intramuscular injections is a nursing procedure that involves safely withdrawing medication from an ampule and delivering it through the appropriate injection route. This requires strict aseptic technique, correct medication preparation, proper site selection, and safe disposal of used materials to prevent infection and medication errors.
Why is this procedure performed?
- To administer prescribed medication safely and accurately through subcutaneous and intramuscular routes
- To ensure correct preparation of medication from an ampule
- To promote effective absorption of medication according to the prescribed route
- To prevent complications such as infection, tissue injury, and medication errors
- To observe the patient for therapeutic effects and possible adverse reactions.
Materials Needed
- Medication card
- Sterile gloves
- Medicine tray
- Prescribed medication in an ampule (2)
- 3cc syringe (2)
- Cotton balls: Dry and Wet (70% Alcohol) in separate containers
- Micropore tape
Assessment
- Review the physician’s order and medication record for medication to be given.
- Assess site if the patient has had other subcutaneous or intramuscular injections.
- Assess the need for assistance.
Planning
- Determine materials needed.
- Wash your hands.
- Gather materials needed.
Implementation
- Verify the right drug to be administered by:
- Read the name of the medication from the record.
- Check the label on the medication before picking it up.
- Check the label again before calculating and preparing the dose.
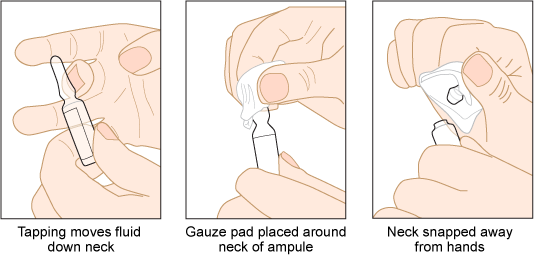
Ampule Preparation
- Tap the stem of the ampule or twist your wrist quickly while holding the ampule vertically.
- Put a gauze pad around the neck of the ampule. Snap back to break off the top of the ampule along the pre-scored line at its neck. Make sure to keep yourself safe from accidental cuts or injuries.
- Discard the head part of the ampule into proper waste receptacle.
- Remove the cap from the needle by pulling it straight off. Hold the ampule with your non-dominant hand and insert the needle into the ampule, being careful not to touch the rim. Insert the tip of the needle into the ampule bevel up and bring ampule and needle at eye level.
- Aspirate the calculated dosage of the medication plus a small amount more.
- Do not inject any air bubble towards the ampule. If any air bubbles accumulate in the syringe, withdraw the needle, tap the barrel of the syringe and expel the air.
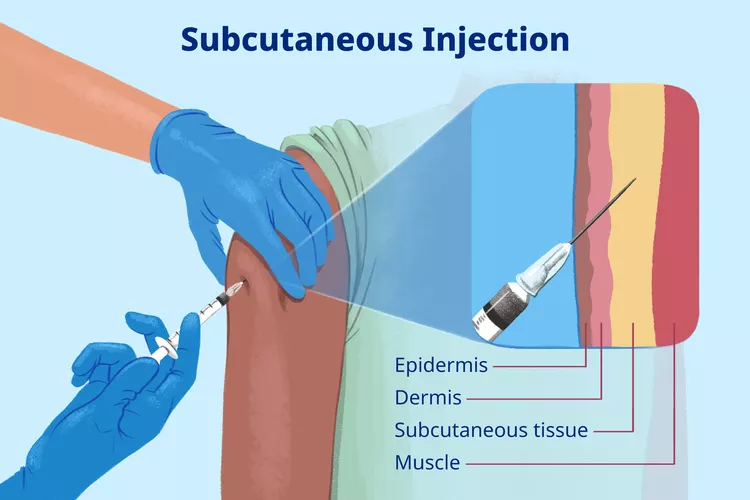
Subcutaneous Injection
- Carry medication and materials along the bedside.
- Identify the patient and explain the procedure.
- Don sterile gloves.
- Locate the site of choice according to the directions given. Ensure that the area is not tender and is free of lumps and nodules.
- Clean the area around the injection site with an alcohol swab in a firm, circular motion while moving outward from the injection site and allow the antiseptic to dry.
- Hold the syringe with your dominant hand between your thumb and forefinger like in writing. Remove the needle cap with the non-dominant hand, pulling it straight off.
- Place a dry cotton ball between the fingers of your non-dominant hand.
- Pinch the area surrounding the injection site with your non-dominant hand. Inject the needle at an angle of 45º–90º depending on the amount and turgor of the tissue and length of the needle.
- After the needle is in place, release the tissue and immediately move your non-dominant hand to steady the lower end of the syringe. Slide your dominant hand to the end of the plunger.
- Inject the solution slowly by applying an even push pressure to the plunger.
- Withdraw the needle quickly at the same angle at which it was inserted. Do not massage the area, instead apply cotton very gently at the insertion site.
- Do not recap the used needle. Discard the needle and syringe in the appropriate receptacle.
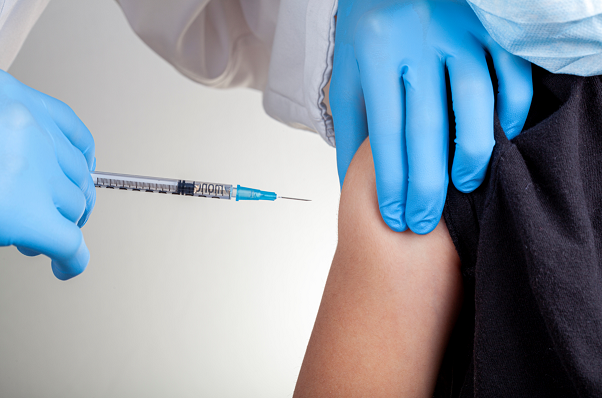
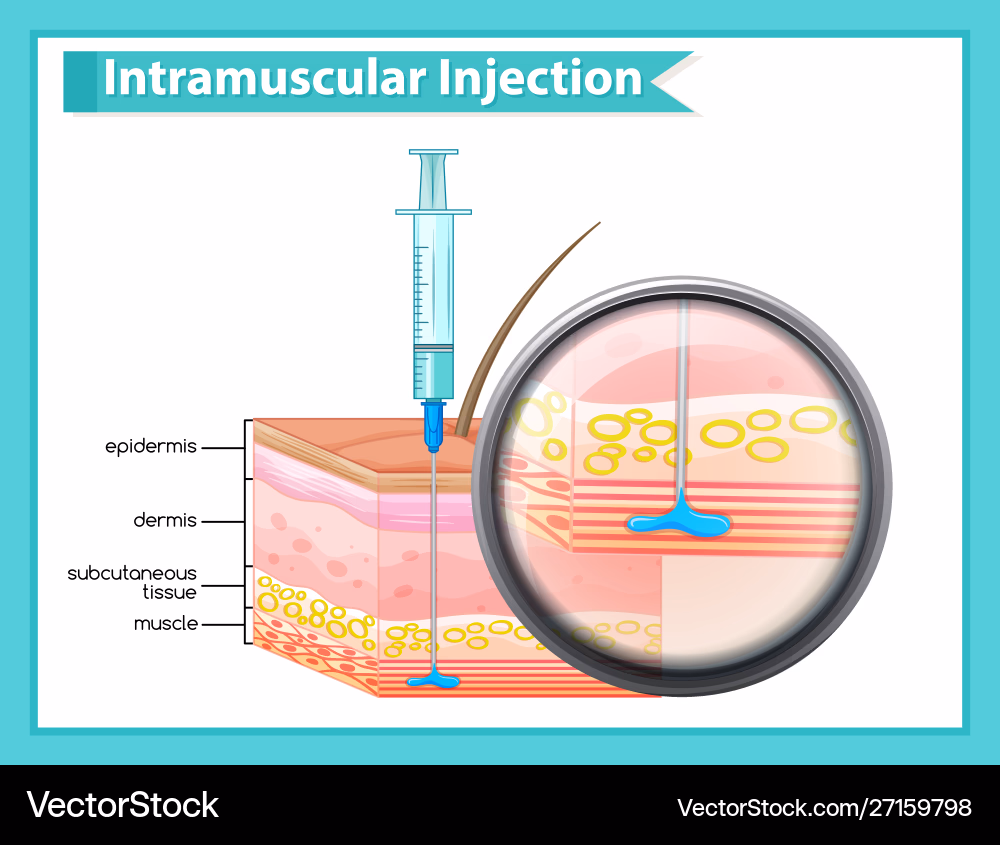
Intramuscular Injection
- Clean the area thoroughly with an alcohol swab in a firm, circular motion while moving outward from the injection site and allow the antiseptic to dry.
- Hold the syringe with your dominant hand between your thumb and forefinger like in writing. Remove the needle cap with the non-dominant hand, pulling it straight off.
- Place a dry cotton ball between the fingers of your non-dominant hand.
- Pinch the bulk of muscle at the insertion site by placing the thumb and index finger of your non-dominant hand to form a V. Inject the needle into the tissue at a 90º angle.
- After the needle is in place, release the muscle and immediately move your non-dominant hand to steady the syringe at insertion site. Slide your dominant hand to the end of the plunger and aspirate by slowly pulling back on the plunger.
- If blood enters the syringe on aspiration, withdraw the needle and prepare a new injection with a new sterile set-up.
- If no blood is aspirated, inject the solution slowly.
- Remove the needle quickly. Massage the injection site with dry cotton using gentle pressure.
- Do not recap the used needle. Discard the needle and syringe in the appropriate receptacle.
- Remove gloves and dispose properly.
- Assist the client to a position of comfort.
- Wash your hands.
Evaluation
- Evaluate using the following criteria:
- 10 rights followed
- Correct site used
- Effectiveness of medication assessed
- Any side effect promptly identified
DOCUMENTATION
Record pertinent data in terms of:
- Medication dosage
- Route of administration
- Time of administration
- Signature